Showing posts with label Gluten Free Desserts. Show all posts

February 3, 2013

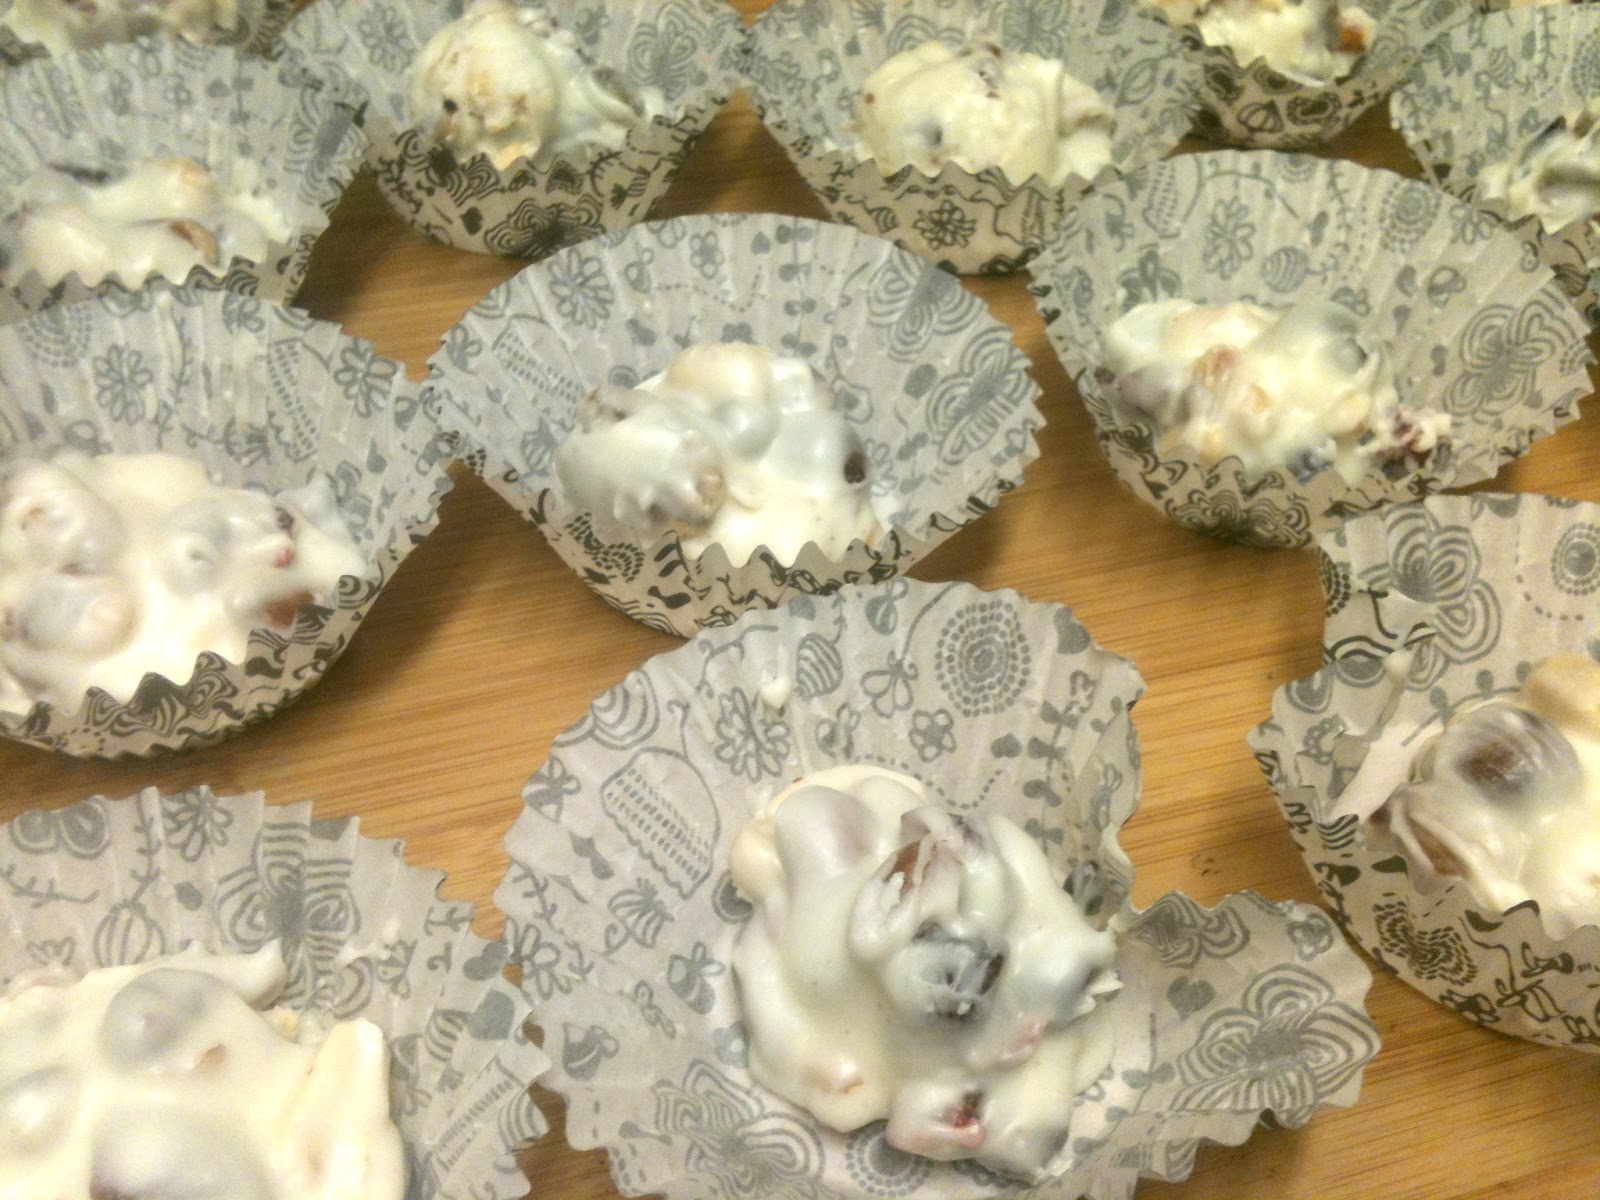
Gluten Free SemiSweet Fruity Chocolates

Here's another candy making experiment of mine.  My first try at being a Chocolateur used white chocolate, mixed nuts and a handful of cranberries.  This one steers clear of nuts and focuses on being nice-n-fruity. All you need is a bag of semisweet chocolate chips and around 2 cups of chopped dried berries.  I used a combination of dried strawberries, blueberries, cherries and cranberries. 

These chocolates were much more popular than the white chocolate candies I made. I could tell how good they were by the way people tried to hoard them, or how they would force themselves to eat only a few a day in order to savor them:).  Regarding proportions... use about 1/2 cup more chocolate chips than fruity bits, and you can't go wrong.

Ingredients
  • 1 bag of semisweet chocolate chips (about 2-2/12 cups)
  • 2 cups of mixed dried berries
  • Cocoa powder (for dusting)
  • Non-stick baking sheet or wax-paper

Directions
  1. Chop your dried berries up as fine as you're able.  These chocolates work best if filled with lots of tiny fruity bits, and not large chewy chunks.
  2. Melt and stir your semisweet chocolate chips in a double boiler, or in 30-second microwave bursts, until  nice and creamy.
  3. Add the chopped berries and stir until completely incorporated.
  4. Let cool until the consistency of thick molasses. 
  5. Spread some wax-paper out, or use a non-stick baking sheet, and spoon small globs of fruity-chocolate about 1-inch apart.  
  6. Let the chocolate cool for a while before dusting your chocolates off with cocoa powder.
  7. Once completely cool, dig in and smile big:)


January 16, 2013

Gluten Free Nutty White Chocolate Cranberry Candies

I've never made chocolate candies before, so you'll have to forgive me for how chunky these are. These were a mouthful to say the least! Next time I make them I'm going to chop up the nuts real nice before mixing them with the melted chocolate.  You can be all professional and use a double boiler to melt the chocolate, or... you can simply use a microwave to quickly and easily melt the chocolate.  All you have to do is put your chocolate chips in a glass bowl (or any other microwave-safe bowl), and heat for 30 seconds at a time, stirring after each round, until the chocolate is melted and creamy.  I'll probably work with a double boiler in the future, even if only to see if there is any difference at all in taste and texture of the chocolate I'm working with.  But for now, as a novice chocolateur, I'm going to keep my sweet experiments as easy to execute as possible:)

Ingredients
  • White Chocolate Chips (2 bags)
  • Dried Cranberries (about 1 cup)
  • Mixed Nuts (1 to 1 1/2 cups) - chopping them up would be good:)

Directions
  1. Chop up your mixed nuts, stir in the dried cranberries and set aside.
  2. Use a double-boiler to melt your chocolate, or... place your white chocolate chips in a bowl and microwave for 30 seconds. Remove and stir. Return to microwave for another 30 seconds. Remove and stir.  By your 3rd round of 30-second nuking and stirring, your chocolate should be ready.
  3. Mix your nuts and dried cranberries into the melted chocolate.
  4. Let sit for a couple minutes and then use a spoon or a small 1/2 inch ice cream scooper to form small mounds of chocolate goodness on a non-stick surface (I used cupcake papers).
  5. Allow candy to cool for 1/2 an hour.
  6. Devour and share!


July 3, 2012

Nutella Oatmeal No-Bake Cookies


This recipe is a modification of my aunt Vicki's no-bake PB Oatmeal cookies. Here's the link to that: PB No-Bake Oatmeal Cookies.  Instead of peanut butter, I decided to use Nutella, added a bit of instant coffee crystals, topped them with white chocolate chips, and viola! Awesomeness!

Here's a link to the Nutella Q&A webpage that states Nutella is GF:  NUTELLA Q & A

Now, I've got to be honest.  Unless you keep these in the fridge overnight, these cookies will not become even close to being solid.  However, they're still ridiculously good, kinda like truffles, and chocolatey fingers and smiles never hurt anyone.  This recipe is still a work in progress, so if you want to ensure that you'll have solid cookies, add half peanut butter and half Nutella, or add 1/2 cup ground almonds to the mix.  And you could always throw them in the freezer for a chocolatey cold summer treat:)

However you make these is irrelevant to how much you're going to love them!

Enjoy!

Ingredients
  • 2 cups sugar
  • 1 stick butter
  • 1/2 cup milk
  • 1 tsp pure vanilla extract
  • 1 tsp instant coffee
  • 3 tblsp cocoa 
  • 3 cups certified GF oatmeal 
  • 1/2 cup Nutella (or 1/4 cup Nutella / 1/4 cup peanut butter)
  • white chocolate chips for adornment 

Directions
  1. Put all the ingredients, except for the Nutella and Oatmeal in a saucepan.
  2. Heat over Medium-Low heat, stirring frequently until all ingredients are thoroughly incorporated.
  3. Add the Nutella (or Nutella/peanut butter combo) and stir around until mixed.
  4. Remove from heat and add the oatmeal, mix well and let sit for 10-15 minutes.
  5. Using a one-inch ice cream scooper (or spoon), drop cookies onto a non-stick cookie sheet or on wax paper.
  6. Place cookies in refrigerator (or freezer) until cooled.
  7. Devour and enjoy!

June 21, 2011

Gluten Free Rice Krispies Treats!

Every single time I used to stroll down the cereal isle in the grocery store, I'd shake my head at the boxes of Rice Krispies, thinking to myself, why don't they just take out the malt flavoring so that they'd be gluten free!  Well, it's finally happened.  Rice Krispies are officially GLUTEN FREE! Thank you Kellogg's!  This news would be less than exciting for non-celiac folk, but for those of us who lost the ability to enjoy these gooey squares of goodness when we were forced to go gluten free, this is big news:)

Now if you've never made Rice Krispies Treats before, they have to be one of the easiest desserts to make.  You can get as creative with this recipe as you want.  For example, you could add some chocolate chips or dried cranberries before forming the squares. Whatever you think would go good with marshmallows and crisped rice you should try.

Ingredients
  • 6 cups Kellogg's Rice Krispies Gluten Free cereal
  • 1 10oz package of regular marshmallows, or 4 cups miniature marshmallows
  • 3 tablespoons margarine or butter

Directions
  1. Melt the margarine/butter in a large pan over low heat.
  2. Add the marshmallows and stir until everything's totally melted.
  3. Remove from heat.
  4. Add your Rice Krispies and stir it all up till completely coated.
  5. Using a buttered spatula or a sheet of waxed paper, press the gooey mixture evenly into a 13x9x2-inch pan coated with cooking spray.
  6. Cut into squares when cooled.
  7. Enjoy!

Remember to look for my Gluten Free Desserts! app for the iPhone, iPad, and on the Droid Store!

June 5, 2011

Gluten Free Mug Brownies

I've been hearing about microwave mug brownies for a while now, but for some reason didn't think they'd be any good.  I mean how good could a brownie cooked in a microwave oven be? Right?  Well, pretty darn good actually:)  Especially when you top your piping-hot mug brownie with a couple scoops of ice cream and a dollop of whip cream!

This recipe couldn't be easier.  Not only is it gluten free, it's egg-free as well.  Depending on your microwave, you may need to cook your mug brownie a little bit longer, or a little bit less.  I suggest you experiment a bit.

This recipe is a perfect way to quickly appease your chocolate cravings. It produces very little mess, and allows you to enjoy warm, gooey brownies without needing to start up your oven.  Enjoy!!!


Brownie Ingredients
  • 1-2 tblsp vegetable oil 
  • 2 tblsp water
  • 1/4 tsp pure vanilla extract
  • pinch of salt
  • pinch of instant coffee
  • 3 tblsp sugar
  • 2 tblsp unsweetened cocoa 
  • 2 tblsp gluten free flour (I used Bob's Red Mill)
  • Ice cream/whipped cream to top (optional)

Directions
  1. Combine the oil, water, vanilla extract, salt and instant coffee in a mug.  Whisk together till blended.
  2. Add the sugar and whisk till blended.
  3. Add the cocoa and whisk till blended. 
  4. Add the gluten free flour and whisk till blended
  5. Pop into the microwave for 90 seconds on high.
  6. Top your hot, gooey mug brownie with ice cream or whip cream and go to town!!

! Remember to check out my GF Recipe APP on iTunes, Droid Store and Amazon.com!

    December 26, 2010

    Gluten Free Peanut Butter Blossoms

    The snow is falling outside. People are sliding all over the roads attempting to get to wherever they're going.  Lawn chairs are being fished out of storage for the impending parking space wars to come. I'm relaxing with my family and enjoying the atmosphere of content inactivity. Last night we had a few friends over for annual x-mas dinner party. Ping pong, guitar hero, x-mas movies, gifts exchanged, and lots of food and drink to overindulge in.  I baked two batches of cookies. The recipe for the first, the GF Peanut Butter Blossoms, is listed below. The other batch I'll post later. Both Awesome!!

    These cookies were sooooo goood!  A few minutes out of the oven, when you take a big bite, and the chocolate kiss on top melts in your mouth and warms your throat... it's a little bit of heaven...  Valhalla.... or wherever you hope to go when you die, wherever that it, you are there. if only for a few seconds. a few perfect seconds. Yum!

    It's simple, just basic GF Peanut Butter Cookies with chocolate kisses buried in the top.

    Ingredients
    • 2 tsp baking soda
    • 2 large eggs (at room temperature)
    • 2 cups peanut butter (natural/no sugar added)
    • 2 cups sugar
    • 1/4 tsp xanthan gum
    • a bag of chocolate kisses

    Directions
    1. Preheat your oven to 325 deg. F.
    2. Unwrap around 36 chocolate kisses from their foil. You may need more, you may need less.
    3. Coat your cookie sheets with cooking spray (check the ingredients), or line the baking sheets with foil. 
    4. Whisk up the eggs in a large bowl. 
    5. In another bowl, mix up the sugar, baking soda and xanthan gum. 
    6. Add the peanut butter to the eggs and incorporate. Then add the sugar/baking soda/xanthan gum and mix thoroughly.
    7. Using a spoon or 1 inch ice-cream scooper, drop dough onto cookies sheets roughly 3 inches apart. Take a flat bottomed glass and smush down the cookies. *I used a glass measuring cup and hammered them all down.
    8. Using a fork, make some hatch marks on the top of each cookie.
    9. Bake each batch for 14 minutes, remove from oven and press one chocolate kiss into the top of each cookie. Return to the oven for two more minutes. Remove and let cool for five minutes. Afterward, transfer cookies to a wire cooling rack.

    December 19, 2009

    Gluten Free Fruitcake


    A few days ago we received a x-mas package from my gramps, my mom and Viola.  Inside it, among other goodies, were 6 carefully wrapped mini-bundt fruitcakes.  On the outside was written "Gluten Free!."  Now normally, receiving a fruitcake in the mail might put a half-disgusted smile on my face, complete with a furrowed brow... but knowing well that my mom and Viola are amazing cooks, I knew I was in for a treat!  I wasn't wrong.  For the last two days I've been unable to control myself. I keep sneaking into the kitchen to cut off another slice. I've even pulled out the spoon and began eating the crumbs like cereal late at night.

    Not only are these fruitcakes delicious, they're loaded with enough rum to warm the belly of even the coldest snowperson!  Or yetti. Or Abomidable Snow Beast. Or whom or what-ever arrives at your doorstep seeking shelter from the storm.  And a key component of what makes these fruitcakes awesome, is the missing ingredient.  You will not find one green fruit thing chunk in these cakes! One of the reasons I've avoided holiday fruit cake was the artificial taste of those green chunks.  Whatever they are...

    Today I called my mom to get the recipe.  The process is impressive!  Listening to my mom explain the steps necessary to produce amazingly delectable GF fruitcake was almost exhausting. I've never baked anything that involved so many steps, but knowing the end-product, I think it's about time for that to change.

    Feel free to use any kind of GF baking flour you like, but my favorite is Bob's Red Mill.
    Also, if you happen to love those green fruity chunky things. Add them. I won't be eating it:)

    *Thanks Viola for the recipe. And thank you too Mom for making them with her:)  Your fruitcakes are AWESOME!*


    Ingredients:

    • 4 sticks margarine or butter (softened)
    • 2 cups sugar
    • 4 tsp vanilla 
    • 2 cups GF Flour (Bob's Red Mill All Purpose Baking Flour)
    • 2 tsp baking powder
    • 2 tsp cinnamon
    • 8 eggs (room temperature)
    • 2 1/2 cups craizins (dried cranberries)
    • 5 cups pecans (chopped)
    • 1 1/2 lb. candied cherries
    • 1 1/2 lb. candied pineapple 

    Directions
    1. Preheat oven to 350 degrees F
    2. Using a mixer, cream the margarine and sugar together in large mixing bowl
    3. Then add the eggs one at a time, using a ladle or large spoon, continuing to mix until fully incorporated, mix in the vanilla then turn off
    4. Sift the dried ingredients together and then add slowly to liquid mixture until fully mixed
    5. In another bowl, mix together the chopped candied cherries and pineapple, the craizins and pecans
    6. Add the nuts-n-fruit to dough mixture slowly until fully incorporated
    7. Unless your mixing bowl is oven proof, transfer the entire mixture to a large oven safe crock or bowl. Make sure there is no dough along the edges of the bowl, to avoid burning, and pack down tight with the back of a large spoon.
    8. Place in oven for 15 minutes. Take out and mix together, pack down
    9. Put back into oven for another 15 minutes. Take out and mix together, pack down
    10. Put back in oven for another 15 minutes. Take out an mix together, pack down
    11. Remember to scrape the sides!
    12. And one more time for good measure...
    13. Then transfer into cooking sprayed, or olive oil coated bundt molds, loaf pans, etc. and dust with GF flour.
    14. Pack the mostly cooked dough mixture into the molds and pat down tightly again.  Return to the oven and bake for another 30 minutes (or until a toothpick comes out clean)
    15. Remove from oven. Allow to cool, and then using double layer squares of heavy duty aluminum foil, place each fruit cake into center and then drizzle spiced/dark rum over the top and immediately wrap tight with aluminum foil
    16. Set them aside to age for a day or so
    17. Get ready for something special - because you're going to love em'! 

    December 14, 2009

    Gluten Free Amish Molasses Cookies

    Wow the holiday season is sooo busy! It's like everyone has parties on the same days.. we're working harder, spending more, getting less sleep and eating a TON of awesome food! It's crazy, but I love it! On Saturday my friend Claudia and I spent the day exploring Amish country around Lancaster. It was a beautiful day for it! We stopped in a ton of little shops; antique places, quilt places, candy stores, bakeries, and old-fashioned country style restaurants. It was nice:)

    After saying goodbye to Claudia, I settled into my kitchen and browsed through the Amish Cookie Book I picked up earlier in the day. These Molasses cookies were chosen for their ease and classic holiday flavor. I used Bob's GF Baking mix for these and they came out great! Make sure they're cooked through though. The first small batch I baked came out a bit doughy:( Also, feel free to throw in a little ginger and/or walnuts to spice it up. That's what I'm going to do the next time with these;)

    Ingredients
    • 1/2 cup vegetable shortening (make sure it's GF)
    • 1/4 pound light brown sugar
    • 2 cups dark molasses
    • 2 cups buttermilk
    • 3 cups gluten free baking flour
    • 1/2 tblsp baking soda

    Directions
    1. Preheat oven to 375 degrees F.
    2. Cream the vegetable shortening and brown sugar.
    3. Mix in the molasses and buttermilk
    4. Stir in the flour and baking soda until fully incorporated
    5. Using a 1-inch ice-cream scooper (or a spoon), drop dollops onto greased or non-stick cookie sheet about an inch or so apart.
    6. Bake for 10-12 minutes.
    7. Transfer to cooling racks and get your cup of milk ready!

    November 1, 2009

    Gluten Free Pumpkin Spice Cookies

    I just had my last weekend class for the semester, and boy is my mind exhausted. Spending 8+ hours with very smart people, making sure to be on top of your game, is always a challenge, and always tiring. I loved it though! I guess I'm just a big nerd, but I love group learning:)

    Since it was Halloween weekend, and we were all stuck in class with each other, we were encouraged to bring in treats to share. I brought these cookies and a gallon of apple cider. The cookies, which my partner whipped up with a recipe I found while I set up the outdoor Halloween decorations in hopes of terrifying the local kids, came out FREAKING AWESOME!! Thank you Mindy;) I absolutely loved em, as did everyone else who tried em! These would be the perfect cookies to bring for Thanksgiving.

    To get the icing to coat the tops just right, you need to wait for the cookies to completely cool first. I know that this may be difficult to do, especially with the scent of warm cookies in the air, and your mouth watering, but trust me... these actually are better chilled. Once cooled and drizzled, I'd advise layering the iced cookies between parchment paper to keep it all sticking together.

    Mindy smartly decided to add walnuts to my recipe, but feel free to omit them if you wish. However, they do give these cookies a nice chunky character. Either way, I'm sure you'll dig these!

    Here's a recipe for the Gluten Free flour baking mix I whipped up.

    Gluten Free Flour Mix
    • 3 cups white rice flour
    • 1 cup potato flour
    • ½ cup tapioca flour
    • 2 tsp xanthan gum


    Cookie Ingredients
    • 5 cups Gluten Free Flour (I made my own, but feel free to use any brand you choose)
    • 2 tsp baking powder
    • 2 tsp baking soda
    • 4 tsp ground cinnamon
    • 1 tsp ground nutmeg
    • 1 tsp ground cloves
    • 1 tsp salt
    • 1 cup softened butter
    • 3 cups sugar
    • 2 cups canned pumpkin
    • 2 eggs
    • 2 tsp vanilla
    • 2 cups walnut chunks

    Glaze Ingredients
    • 4 cups confectioner's sugar (aka powdered sugar)
    • 6 tblsp milk
    • 2 tblsp melted butter
    • 2 tsp vanilla

    Directions

    1. Preheat the oven to 350 degrees F.
    2. Combine the flour, baking powder, baking soda, cinnamon, nutmeg, cloves and salt and set aside.
    3. In a large bowl, cream together a cup of softened butter and the sugar.
    4. Add the pumpkin , eggs and 1 tsp vanilla. Beat until creamy (either with an electric mixer, or some serious arm power).
    5. Incorporate the dry flour mixture into the wet pumpkin mixture and then stir in the walnuts.
    6. Drop by spoonfuls onto a non-stick baking sheet, slightly flattening them as you go, and bake for 15-20 minutes, or until edges are lightly toasted.
    7. Remove from oven and let each batch cool completely on a cooling rack before drizzling with the icing. To make the icing, simply whip together all the ingredients until nice and creamy. Use a fork to drizzle.
    8. Wait till the icing dries and layer cookies between parchment paper sheets in a large bowl or pan.
    9. This recipe makes a TON of cookies, so be prepared to share. Enjoy!!


    September 10, 2009

    Gluten Free Rum Boulders

    I brought these goodies to my friend's birthday party (along with some rum nuggets) and they were a hit! Mindy and I had a bottle of Appleton Rum that we brought back from Jamaica, so I figured what better way to put it to good use. I was pretty heavy-handed with the rum, so feel free to use less.  I wrote about Rice Chex going gluten free a while ago, and now there are a number of GF Chex cereals.  I love the Honey Nut, Cinnamon Chex and Chocolate Chex cereals, but Corn Chex is great as well.  It's so great going to a normal grocery store and being able to pick up mainstream GF products. What a difference a few years can make!


    I used half a box of Chocolate Chex to make these Rum Boulders, but feel free to experiment with any of the Chex cereals.  Also, I used ground walnuts, but these would be great with ground or crushed almonds as well.  These keep well when wrapped up and put in the fridge, and can be a great alternative to a drink after work:)  And if you want, you could always spread the mixture out in a shallow pan and have yourself some GF Rum Bars to bring on the hiking trails.  Enjoy!

    Ingredients:
    • 14oz can of condensed milk
    • 1/2 box of Chocolate Chex Cereal (crushed)
    • 1/2 cup walnuts (crushed or ground)
    • 1/2 cup golden raisins 
    • 1/2 cup rum
    • 1/3 cup cocoa 
    • 1/2 cup shredded coconut 

    Directions:
    1. Place golden raisins and rum in a bowl and set aside to soak.
    2. Mix the crushed Chex with the walnuts, condensed milk, cocoa, coconut, rum and raisins together. If mixture is too sloppy or gooey, add more cocoa and coconut.
    3. Using a couple of spoons, shape the mixture into double bite-size mini-boulders and place on wax paper or in paper cupcake holders. (I used the mini ones)
    4. Place in fridge to set for about an hour. 
    5. Transfer to airtight container.
    6. Dig in and enjoy!  Don't eat too many of these though, I did and ended up with a slight hangover.

    June 16, 2009

    Gluten Free Hulled Hemp Seed Crisps

    Every so often I get a package in the mail, chock-full of gluten free goodies to test out.  For example, I recently received an array of GF snacks from Kays Naturals.  I had a great time testing their products out, and discovered a few favorites (I'll be posting a product review on Kays soon). If you've been reading this blog, then you know how often I use Bob's Red Mill products.  It's no secret that I love their products.  Once they realized what a big fan I am, they began sending me goodies to try and experiment with.

    One day I received a bag of Hulled Hemp Seeds.  At first, I had no idea how I was going to use them, but after doing a couple of Google searches, I had a few ideas.  This following recipe is my first experiment using Hemp Seeds in a recipe.  Hemp seeds are actually really good for you.  As stated on the Bob's Red Mill website, "Hulled hemp seed is high in Omega-3 and Omega-6 essential fatty acids, and an excellent source of protein containing all of the essential amino acids."  Of course, being the sweet-tooth that I am, I had to begin my hemp seed experimentation by whipping up some cookies.  However, in the future I plan to incorporate them in breads, muffins, and possibly as a crunchy breading for fish or chicken.

    These cookies were super-yummy!  They were a bit crumbly, but melt-in-your mouth delicious. Enjoy!

    Next post: Chongqing Flashback Part 1

    Prep Time: 5-ish minutes
    Baking Time: 10-15 minutes depending on your oven

    Ingredients:

    Baking Instructions:
    1. Preheat the oven to 350 degrees F.
    2. Lightly grease a cookie sheet and set aside (I used cooking spray)
    3. Mix together the brown sugar, large egg and butter in a bowl.
    4. In a separate bowl, whisk together the GF flour, cinnamon, and shelled hemp seeds.
    5. Mix together the dry and wet ingredients until fully incorporated.
    6. Spoon mixture onto cookies sheets.  Leave about 3 inches between each drop since they spread out!
    7. Bake for 10-15 minutes, or until the edges are crispy. Cooking time depends on the oven being used, so keep an eye on them.  You don't want to burn these sweet treats!
    8. Grab a mug of soy, rice or cow milk and chow down:)

    February 20, 2009

    No-Bake Gluten Free Cocoa Peanut Butter Oatmeal Cookies

    Try to say that title 5 times fast:)  I love these cookies!!!  These cookies have been a part of my life for a long time. I think the first time I had these I was 7 years old. I watched my Aunt Vic mixing the ingredients together in a cast-iron bowl on an antique wooden stove.  The smell of the bubbling chocolate potion was maddening. I remember salivating as she ladled the gooey dough onto wax sheets to cool.  I must have eaten a dozen at least! I think I eventually crawled off to some dark corner, uncomfortably intoxicated with sugar, and drifted into a narcotic coma.

    Afterwards I begged my mom to get the recipe. Throughout the years as I grew older, these cookies continued to make their presence felt. Looking back, and knowing how much sugar goes into these, I can understand why my mom didn't make them as much as I would have liked; these are the antithesis of diet food:)  But they are soooooo worth it! 

    I've been craving these lately for some reason. This is actually the first time I've made them myself. Knowing my weakness with these little drops of evilness, I strategically cooked up a batch the night before a case conference where I intern. That way, I could spread out the sugar, and avoid putting myself into some kind of diabetic coma. They didn't last long, but I kept a little stash for myself.  Actually, I'm going to get one right now...

    Oh yeah        these rock!

    Enjoy

    Cookie Ingredients
    • 2 cups sugar
    • 1 stick butter
    • 1/2 cup milk
    • 1 tsp. all natural vanilla extract
    • 3 tbsp. cocoa 
    • 1/2 cup peanut butter
    • 3 cups oats (I used Bob's Red Mill GF Whole Grain Rolled Oats)

    The Process
    1. In a medium saucepan, throw together all the ingredients except the peanut butter and oats. 
    2. Cook over medium heat and bring to a boil, stirring frequently.
    3. Remove the saucepan from the heat and throw in the peanut butter and oats. Stir it up good.
    4. Clear your countertop or kitchen table, and rip off a couple long sheets of wax or parchment paper.  
    5. Using a 1" ice cream scooper, or a spoon, drop the warm mixture onto the sheets about 3 inches apart.
    6. Let cool for about 20 minutes. 
    7. Devour! 

    February 11, 2009

    Gluten Free Cranachan

    What a beautiful day! I just finished walking around Swarthmore College with my friend Erika, the sun is out, it's about 62 degrees, and I'm sitting at my front-yard patio table.  I only wish I didn't have to go to work and to night class.  When I woke up the first thing on my mind was to go skateboarding at Havertown Skatepark, but although it was warm out, everything was still wet.  Now everything is drying up and I have to go to work. Booo!  However, tomorrow looks promising, so I plan on getting up and heading to the park first thing in the morning.

    Weather in Philadelphia is so weird. Just a few days ago it was nasty and freezing, and now it feels like late Spring.  Not that I'm complaining though, since all the people I grew up with in Upstate New York will likely have to wait months before decent weather rolls in.

    Last Friday our friends Joy and Jason came over for a dinner party.  They brought the booze and I provided the food.  I ended up making a  three course meal.  This is the desert I made. It was awesome!! The appetizer salad I made was kickin too, so I'll be sure to post what I made for my next entry, but I just had to share this recipe first.  It calls for the use of whisky or bourbon.  I'm sure you could just use apple cider/juice and honey instead of liquor, but what fun would that be?  Although it looks complicated, this desert is really easy to make, and is completely delicious! 

    This is what I found out through a little bit of research: Cranachan is a traditional Scottish dessert. It's usually made from a mixture of whipped cream, whisky, honey and fresh raspberries mixed with toasted oatmeal.  Cranachan was originally a summer dish consumed around harvest-time. However, it's now likely to be served year round during special occasions like birthdays, anniversaries, and especially weddings.


    Cranachan Ingredients
    • 4 tbsp. honey
    • 3 tbsp. whisky or bourbon 
    • 3/4 cup oatmeal (make sure it's certified gluten free!)
    • 1 1/4 cups heavy cream
    • 2 cups raspberries
    • 1 tbsp. sugar
    • splash of water

    Cooking Directions
    1. Add the honey and whisky together in a small pan. Heat the mixture on low, stirring frequently, until warmed through. Remove from heat and set aside to cool.
    2. Preheat the broiler. Spread the oatmeal in a shallow layer in a grill pan and toast. Stir occasionally, making sure not to burn the oatmeal (which is very easy to do!). Remove from broiler once browned. Set aside to cool.
    3. Using a hand-held electric mixer, whip the heavy cream in a large bowl until soft peaks form, then gently fold in the oatmeal and the honey/whisky mixture. Mix until well combined. 
    4. Put a small handful of raspberries aside and begin layering your glasses or small bowls with alternating layers of raspberries and the cream mixture. Top with raspberries for decoration.
    5. Smash up the remaining raspberries in a small cup with a splash of water and the sugar until saucy. Dribble this raspberry sauce over the prepared Cranachan and then place in the fridge for about 15 minutes.
    6. Serve it up and enjoy every bite. You'll love it!

    Serves 4

    January 27, 2009

    Gluten Free Chocolate Kiss Cookies

    I hit the ground running this semester, and things don't seem to be slowing down. It's all good though, since everything I'm doing is exactly what I want to be doing.  I'm finishing up a research project on men and domestic violence work; preparing to spend the month of May in China teaching social work and conducting research; interning as a clinical sexuality counselor; teaching an after-school sexuality education class; getting ready to graduate with two Masters degrees; and getting married in July.  This is turning out to be the busiest year EVER!!!  Although I'm feeling pretty content with the way my life is turning out, I do hope things slow down after the wedding.  I'll be needing some serious R&R come the end of Summer, and I don't think a couple week honeymoon will cut it (although it'll be a great start)!

    During times like these, I find it a matter of self care to give in to my chocolate addiction.  The following cookie recipe uses Hershey's Kisses. It comes from one of my favorite cookie books: HERSHEY'S Classic Recipes. According to this link: "GF Candy Database" and other sources, Hershey's Kisses are gluten free.  However, as with most products coming from huge factories, there is a slight chance of cross-contamination.  Now I've never had a negative reaction to Hershey's products, if you are worried about it, or have an extremely sensitive system, simply replace the kisses with chunks of your favorite GF chocolate. Be prepared, because this one is messy!

    Chocolate Kiss Cookie Ingredients
    • 1 cup (2 sticks) butter, softened
    • 1 tsp. all natural vanilla extract
    • 2/3 cup granulated sugar
    • 1 2/3 cup all purpose gluten-free flour (I use Bob's Red Mill)
    • 1/4 cup baking cocoa
    • 1 cup pecans, finely chopped
    • 1 bag (9 ounces) Hershey Kisses (or chocolate chunks)
    • Powdered sugar

    Baking Directions
    1. Beat the butter, granulated sugar and vanilla in a large bowl until creamy. 
    2. Mix the flour and cocoa, then gradually add the creamy butter mixture. Beat until blended.
    3. Add the pecans and incorporate.
    4. Refrigerate the dough for about an hour, or until it's firm enough to handle.
    5. Heat the oven to 375 degrees F. 
    6. Remove the wrappers from the Hershey's Kisses (or cut chocolate into 1/2 inch chunks). Mold about a tablespoon of cookie dough around each piece of chocolate, making sure to cover completely in order to shape it into a ball.
    7. Place each cookie dough ball onto ungreased cookie sheets, about 3 inches apart.
    8. Bake for about 10 to 12 minutes, or until dough appears set.  Remove from oven and cool for a few minutes before transferring to wire racks.
    9. Once cooled, dust with powdered sugar (optional).
                                                        

    January 5, 2009

    Gluten Free Golden Raisin Pumpkin Squares

    Can you believe the holidays are over already!? Did anyone else notice a different feel to this holiday season?  Like what people received from each other wasn't important as the time spent? Maybe it was just me. Regardless,  my winter break absolutely flew by.  My partner and I drove to Georgia to spend time with my family.  We cooked a ton!!  It was really nice to just chill out with family for a change.  Living and attending graduate school in the Philadelphia area is great, but I have absolutely no family anywhere nearby. From there we drove to Syracuse, NY to spend time with our two great friends, Cheryl and David Vermillya.  I've known them for close to 20 years, and we've made it a ritual to spend New Years with them. Just like the last three years, we awoke on New Years Day to the smell of freshly brewed coffee (that we brought back from San Juan Puerto Rico as a gift) and the sounds of folk music. After breakfast we took a trip to Beaver Lake to cross-country ski.  There had been a small storm a few days before we arrived so there was a good base of snow waiting for us.  It was a beautiful day to be out in the woods:)

    Back to Georgia... this recipe is an adaptation of my banana bread recipe. Just like the original banana bread recipe, I cooked it until a toothpick inserted in the center came out clean.  I sliced up some small square samples and handed them out.  After the first bite I was in love. At first I didn't know what to call it. It's texture was kind of like a cross between bread pudding, a slice of pie and a brownie. And boy was it good! It was hard not eating the entire pan in one sitting, I'm not even joking. It became one of those situations where you make compromises with yourself regarding how much more you'll allow yourself to eat, or, how much longer you'll make yourself wait for the next slice.  This is how it was when it was still warm: completely, and seductively sinful! Well, at least it was to me at that moment in time:) But seriously, this is yummy! Make it, you'll love it! That is, if you have a throbbing sweet tooth and love the taste of pumpkin and golden raisins.

    My mom hooked me up with the red plate and insisted on adding a dab of fluff:)

    Recipe Ingredients
    • 3 cups gluten free flour (I used Bob's Red Mill All Purpose GF Baking Mix)
    • 1/2 tsp baking powder
    • 3/4 tsp sea salt (or regular salt)
    • 2 cups white sugar
    • 1/2 cup brown sugar
    • 2 tblsp pure vanilla extract
    • 1 1/2 to 2 cups canned pumpkin
    • 2 cups golden raisins
    • 1/4 cup soy, rice, or buttermilk
    • 1 cup vegetable oil
    • 3 large eggs

    Baking Instructions
    1. Preheat oven to 350 degrees F.
    2. Coat a 13" by 9-ish" baking pan with cooking spray (check ingredients for gluten) and set aside. In a large bowl whisk together the flour, baking powder and salt. Set aside.
    3. In a medium bowl, using an electric mixer or hand mixer, beat the eggs, sugars and oil until combined. Beat in the flour mixture until just combined. Next, mix in the vanilla, pumpkin, golden raisins, and milk. 
    4. Pour the mixture evenly into the prepared baking pan. Bake for 60-65 minutes, or until a toothpick entered into the center comes out clean. Remove and let cool.
    5. Grab some whip cream and go to town!

    December 13, 2008

    Gluten Free Double Chocolate Chunk Peanut Butter Cookies

    A little over a week ago, I found myself trying to figure out what to bring to a foodie gathering being held in the home of fellow food bloggers, Messy and Picky.  Although I had never met Messy and Picky, I knew the foodie in charge of sending out the invitations.  Her name is "E" and she writes the blog, "Foodaphilia." With very little time to prepare, I whipped up a bowl of Golden Sunshine Quinoa Salad, using Bob's Red Mill Organic Quinoa, and a batch of cookies based on my favorite Chocolate Chip Cookie recipe.

    I brought my partner Mindy, and my good friend Erika along with me for the ride.  When I entered, I found a beautiful home filled with complete strangers, talking, drinking and eating. They were mostly surrounding a table displaying a wondrous banquet of food.  As we began to intermingle with the guests, I discovered that I knew another person in the crowd.  I began to chat it up with Lauren, the author of the food blog "I'll Eat You."  Lauren, E, and I had all met previously during a dinner gathering for Foodbuzz featured publishers, at Fork Restaurant in Philadelphia.

    Throughout the evening, I ate a ton of great food, tasted a variety of wines, and met many cool people.  One of the people I chatted up happened to be a food writer for the Philadelphia Inquirer.  He ended up mentioning me and my blog in his article "On the Side: Live and in person, the food bloggers munch." Thanks Rick Nichols!!!  We left the party with full stomachs, healthy buzzes, and a sense of excited anticipation for the next gathering.

    The Double Chocolate Chip Peanut Butter Cookies I whipped up in a flash ended up being quite tasty!  I used Trader Joe's brand Organic Creamy Peanut Butter, but feel free to use any GF peanut butter you like.  It's hard to go wrong with the ingredients in these cookies:)

    Cookie Ingredients:
    • 2 sticks softened, unsalted butter
    • 1/2 cup granulated sugar
    • 1/2 cup brown sugar
    • 1/2 tsp sea salt
    • 3 tsp pure vanilla extract
    • 2 large eggs
    • 2 1/5 cups gluten free flour (I used Bob's Red Mill All Purpose GF Baking Flour)
    • 1 tsp baking soda
    • 1/2 cup pure cocoa powder
    • 3 cups chocolate chunks or chips (make sure they're GF!)
    • 1 cup natural peanut butter

    Baking Directions:
    1. Preheat oven to 375 degrees F.
    2. In a medium bowl, using an electric mixer, beat the butter, peanut butter, sugars, salt and vanilla until well combined. Beat in the egg. Scrape the bowl using a spatula as it mixes.
    3. In a small bowl, whisk together the GF flour, cocoa and baking soda. Add the dry ingredients to the wet mixture and mix on low speed until just absorbed. Remove the mixture from the electric mixer and incorporate the chocolate chunks with a strong spoon or spatula. 
    4. Using a 1-inch ice cream scooper, drop dough balls about 3 inches apart onto non-greased baking sheets. Bake for 9-12 minutes, or until centers no longer appear moist. Let the cookies sit for 5 minutes before transferring them to wire racks to cool completely.
    5. Grab a tall glass of milk (or soy milk), kick back, and chow down!

    December 7, 2008

    Gluten Free Apple Butter Galette


    I don't spend that much time watching TV, but when I do I typically watch something I can learn from. I'm that much of a dork! This recipe was inspired by a segment of a show on the Food Channel called "Real Cooking." It seemed so easy and fun, that I just had to try it out myself.  I decided to experiment with the dough recipe that my Almond Fudge Bars were made with. It worked out pretty well. Being that I had only caught a snippet of the show, I really didn't know what this desert was called. However, I just happened to come across a similar recipe on The Hungry Mouse's blog, and discovered that what I was making was a kind of rustic Galette.


    A couple weeks before making this delicious desert, I did some shopping at a place called Linvilla Orchards, and picked up a couple jars of Apple Butter. I absolutely love peanut butter and apple butter sandwiches! YUMMY! The galette on the TV show used fig jam for a base, but I wanted to try apple butter. Next time I'll go with the figs.  I'm sure you can use any kind of apple with this dish, but since I was born on Cortland, NY, I decided to use my favorite apple of all, the Cortland Apple.  

    When making the crust, make sure that you spread it on well-floured parchment paper. Also, have a bowl of GF flour close by, since you'll need to keep your hands constantly floured to avoid sticking to the dough. The dough will be very thin, so to avoid tearing, use the parchment paper to lift the dough toward the filling.  It doesn't have to be perfectly formed, just try to avoid leaving any open holes in the dough.

    Galette Ingredients:
    • 4 or 5 peeled, cored and sliced apples
    • 1 tblsp cinnamon
    • 1 tsp nutmeg
    • 1/2 cup granulated sugar (plus a little extra for sprinkling)
    • 1/2 cup powdered sugar
    • 1 1/2 cups apple butter
    • 1 cup (2 sticks) softened butter
    • 1/4 tsp salt
    • 1 1/4 cup all purpose GF flour or baking mix (I used Bob's Red Mill)
    • 2 eggs

    Baking Instructions:
    1. Preheat oven to 400 degrees F. 
    2. Beat the butter, powdered sugar and salt in a large bowl until fluffy. Add flour and mix well. With GF floured hands, press the dough on a floured sheet of parchment paper.  Work the dough into a circular shape (10 to 12 inches in diameter). 
    3. In a bowl, toss the apple slices with 1/2 cup sugar, cinnamon and nutmeg until well coated. Spread the apple butter into a small circle in the center of the dough.  Pile the apple slices onto the apple butter circle (you may have more than you need). 
    4. Using the parchment paper, lift the dough (one side at a time) toward the center of the apples.  Pinch the dough together as you go.  This part is a little tricky, so be careful not to create any large tears. Once you have the galette fully formed, transfer (still on the parchment paper) to a baking sheet.
    5. Whisk the eggs with a splash of water in a small bowl, and then brush the outside of the galette dough. Sprinkle the egg-coated dough with granulated sugar.
    6. Bake for 35 minutes, or until dough is golden.
    7. Serve with a couple scoops of ice cream and dig in!

    November 22, 2008

    Gluten Free Chocolate Marshmallow Chex Bars

    One of the staples of bake sales across the country, Rice crispy treats have to be one of the easiest sweets to make. Unfortunately rice crispies contains malt flavoring, and malt contains gluten, therefore completely off-limits to celiac sufferers.  Fortunately, there is ONE name brand cereal that has gone gluten free: Rice Chex. I wrote a blog a while ago about Rice Chex going gluten free, here is the link "Rice Chex Article." This is my first experiment making cereal bars with Rice Chex.  It's basic, super fast, and most importantly, EASY.  As far as the Marshmallows go, I've found most brands to be gluten free like Kraft Jet Puffed, but check the ingredients. Experiment by adding coconut flakes, nuts, M&Ms, or substitute any other gluten free cereal in this recipe.  I brought these into work. They were very popular:)


    Ingredients
    • 6 cups of Rice Chex (no other Chex products are GF, YET)
    • 1 cup of chocolate chunks/chips (make sure GF)
    • 1 pound bag of Marshmallows (any size)
    • 1 1/2 sticks butter

    Cooking Directions
    1. Throw the butter in a big pot over low heat until melted.
    2. Add the marshmallows and stir consistently until completely melted (10 minutes or so).
    3. Add the chocolate and the Rice Chex, stir until the cereal is completely coated.
    4. Scoop out the mixture and press into an 8" x 12" pan.  Press to compact. Place in fridge to cool.
    5. Once cool, slice into squares and chow down! 

    November 13, 2008

    Iced Lemon-Pistachio Biscotti

    Ever since I began this blog, I've been constantly learning.  Not only have I been learning how to cook better, but also more effortlessly.  It's so true what they say about practice; the more you do something the easier it gets.  I've always loved to cook, but I used to be more cautious with culinary experiments.  Partly due to economical reasons (it's expensive to burn up prime cuts of meat), but mostly because I had no real push to improve. This blog has motivated me to expand my ability to create amazing meals and deserts, and I'm loving it!  I've been learning how to make things I never thought I'd attempt, like cheesecake, fudge, and BISCOTTI. Did I mention that I love biscotti.

    I've caught the joy-of-cooking bug, and hope I'm eternally afflicted. Although I don't have any kids yet, I can imagine how hard it would be for busy parents to find the motivation to get creative with cooking. However I think it's important to try.  Turning any meal into a communal experience helps people bond in a special way.  Allowing the kids to pitch in makes it a family event that always has a happy ending (EATING!). Patterns and predictability can be comforting at times, but they can also stagnate. Personally, there is something about exploring the world of edible art that gives me a truly visceral sense of being human.

    Now onto the recipe... The only laborious part of the following recipe was grating the lemon zest. I did end up doubling the recipe so I had enough to share with my co-workers, which made the zesting process twice as long, but completely worth it.  The flavor the lemon zest adds to the biscotti is unreplaceable.  I used Bob's Red Mill Gluten Free Baking Mix, but feel free to use any GF baking mix you prefer.

    Biscotti Ingredients
    • 1/3 cup softened butter
    • 2/3 cup sugar
    • 2 tsp. baking powder
    • 1/2 tsp. salt
    • 2 eggs
    • 1 tsp. natural vanilla
    • 2 cups gluten free flour
    • 4 tsp. finely grated lemon peel (ZESTY!!!)
    • 1 1/4 cups unsalted pistachio nuts

    Lemon Icing Ingredients
    • 1 cup sifted powdered sugar
    • 1 tsp. finely shredded lemon peel
    • 2 tblsp. milk, soy milk, or lemon juice

    Biscotti Cooking Directions
    1. Lightly grease 2 cookie sheets and set aside (I used cooking spray).
    2. Preheat oven to 375 degrees F.
    3. Using an electric mixer and a large bowl, beat the butter on medium to high speed for 30 seconds.  Add the sugar, baking power, and salt. Beat until combined, occasionally scraping the sides. Then beat in the eggs and vanilla until fully incorporated.
    4. Beat in as much of the flour as you can with the mixer. Add what's left of the flour and mix by hand.
    5. Stir in the shredded lemon peel and pistachio nuts.
    6. Divide the dough in half, and using well floured hands, shape each portion into 8-inch long rolls.  Flatten them down a bit until they are about 2 1/2 inches wide and an inch thick.
    7. Place at least 3 inches apart on your prepared cookie sheets and bake for 20 to 25 minutes, or until golden brown and tops have cracked. Remove from oven and cool on the cookie sheet(s) for 30 minutes.
    8. Take a serrated knife and cut each roll diagonally into 1/2 inch slices. Place slices cut side down on the cookie sheets. Lower the oven to 325 degrees F.. Bake biscotti for an additional 8 minutes and remove from oven. Turn each slice over and return to the oven for a final 9-10 minutes, or until dry and crisp (be careful not to burn them!).
    9. Transfer to a wire rack and let cool. Once cool drizzle with lemon icing and chow down!

    Lemon Icing Directions
    1. In a small bowl, stir together the powdered sugar, lemon peel, and chosen liquid until it reaches a drizzling consistency.  How easy is that?! 
    2. Enjoy!!!

    November 1, 2008

    Double Chocolate Biscotti

    Although this website is in a blog format, when I first decided to put this page together, my intention was to simply provide a place for people with celiac disease and/or wheat allergies to find useful information that would make their lives easier.  When people are first diagnosed with celiac disease, it can feel pretty overwhelming.  It typically calls for a complete dietary change, and a lot more home-cooked meals.  Having the ability to go out to a restaurant with friends and family taken away from you can be pretty depressing, which is why I created the gluten free restaurant menu list that is located down the left-side column.  If you know anyone with celiac disease, or wheat allergies, or food allergies in general, let them know about that list.  And if you notice a page has been outdated, or has an "error" message, let me know so I can update it.

    Besides the gluten free restaurant menu list on the left column, I also have a list of useful websites for people with gluten issues.  All of the main celiac organizations are there, as well as great sites like Traveling Gluten Free and Be Free For Me. Traveling Gluten Free is a database of gluten free eating destinations world-wide, which is a great resource for those of us who travel a lot.  Be Free For Me is a website loaded with recipes that are categorized by the food allergy/sensitivity they avoid.  It's a really cool site for anyone with any kind of food allergy. 

    Now back to the FOOD!  Biscotti has lost it's intimidation factor with me. I used to think it was so hard to make, that only expert bakers could pull it off.  I now know that biscotti has to be one of the easiest baked goods to create, and the possibilities are endless!  I decided to quiet the angry chocolate monkey that is persistently on my back, by giving this recipe a double dose of cocoa.  Any high grade baking cocoa is usually safe from gluten, but it's important to read the ingredients in your chocolate chips for things like "modified food starch," "maltodextrin," and "malt flavoring." As a rule of thumb, the higher quality the chocolate chips/chunks, the less likely they'll contain fillers.  Chocolate is perfect by itself! Why anyone would contaminate good chocolate with artificial flavors and gluten-containing fillers is beyond me; but it basically comes down to money.  The less actual food ingredients it contains, the cheaper it will be to produce.

    In this recipe, you can use chocolate chips or chunks depending on your preference.  You can also melt chocolate and coat the tops of each piece after the biscotti cools, thereby making it a triple chocolate biscotti!  However you do it, experiment and have fun with it:)  Food is all about sharing and sensual pleasure.  The joy is not only in eating the food, but also smelling it and looking at it.  Enjoy yourself, because that's what it's all about!

    Double Chocolate Biscotti Ingredients
    • 1/2 cup softened butter
    • 2/3 cup sugar
    • 1/4 cup unsweetened cocoa powder
    • 2 tsp. baking powder
    • 2 eggs
    • 1 3/4 cups all purpose gluten free flour (I used Bob's Red Mill)
    • 1 1/4 cups chocolate chips or chunks

    Baking Instructions
    1. Preheat oven to 375 degrees F.
    2. Lightly grease a cookie sheet and set aside (I use canola oil spray)
    3. Place the butter in a large mixing bowl, and with your electric mixer, beat the butter on med to high speed for 35-ish seconds.
    4. Add the sugar, cocoa powder, and baking powder to the mix. Beat until combined, making sure to scrape the sides of the bowl to get it all incorporated.
    5. Beat in the eggs until combined, and then as much of the flour as you can before it gets too clumpy.  Remove the mixer and stir the remaining flour by hand. Stir in the chocolate chunks or chips.
    6. Shape the dough into two 9-inch long rolls.  Place the rolls on the prepared cookie sheets and flatten them slightly so that they're about 1/2 to 1-inch thick.
    7. Bake for 20 to 25 minutes, or until a wooden toothpick inserted in the center comes out clean.  Cool on cookie sheet for 1 hour.
    8. Using a serrated knife, cut each roll diagonally into 1/2 inch slices. Place the slices, cut sides down, onto an ungreased cookie sheet.
    9. Bake at 325 degrees F. for around 8 to 9 minutes.
    10. Turn the slices over and bake for an additional 7 to 9 minutes, or until dry and crisp (be careful not to burn them!).
    11. Transfer to a wire rack and let cool.
    12. Make a cup of coffee for dipping purposes and enjoy!

    LinkWithin

    Just So You Know...

    The information presented in this blog is intended to educate and entertainment. However, I'm not a medical expert.  I also do not know absolutely everything about Celiac Disease.  What I do know has been learned through trial and error, research, and what has been taught to me by friends who also share my food-related affliction.  Please take the time to do your own research about Celiac Disease and gluten-related issues.  I have a list of links to useful resources along the left-side of this blog. Also, feel free to cross-check my statements. If you find contrary information, please let me know. Thanks so much for visiting Trav's Gone Gluten Free!